Page 1 of 1
HUSH - Galley makeover
Posted: Sat May 05, 2012 4:18 am
by JoeWalling
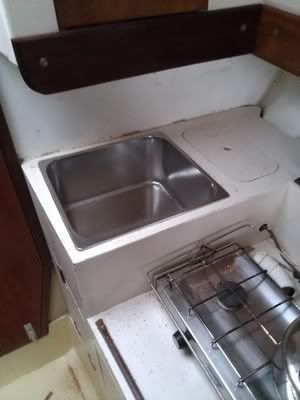
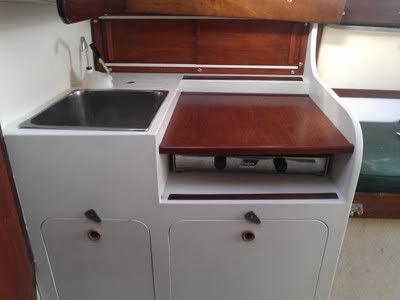
Here is how it started except that I have cut a hole to suit the shiny new rectangular sink which you can see. Prior to that there had been a small circular sink bowl sat on an illfitting and horrible piece of plywood together with a rusty vertical pump. Well the new sink fits but where can I put the new pump? See that inspection hatch behind the sink? It gives access to a large storage area. Its going to have to be smaller, to accommodate the new pump.
The rest of the joinery was solid enough faced plywood but in bad decorative repair and illfitting in places particularly where it met the hull so I stripped everything off and then spent about two weeks filling, sanding and painting. Two coats of undercoat and two coats of a soft cream coloured topcoat, all applied by roller. Took a long time but looks very nice now - no brush marks.
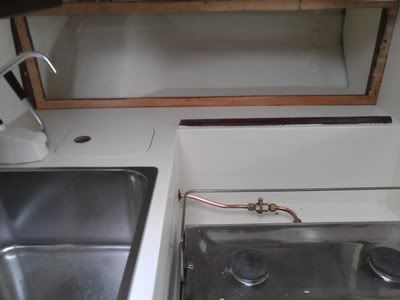
Here you can see several things.
1.The cabinet has been repainted.
2. The cooker gas pipe has been cleaned.
3. The inspection cover has been reduced in size to allow for the pump to be fitted. It will have a nice teak ring fitted, as will the front cabinet doors.
4. Work had started on the back plate area. This is going to be a cupboard with sliding doors.
HUSH - Galley makeover
Posted: Sat May 05, 2012 4:57 am
by JoeWalling
This took forever to do as I constantly had to construct then deconstruct it. the problem was that there was not enough access space to buil the thing and slip it behind the top cupboard moulding.
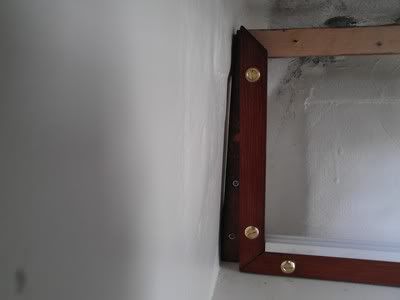
Firstly, I screwed in two vertical pieces of wood to mark out the location for the cupboard doors.You can just see the left hand on in the 1st of these photos and you'll see the problem I faced - the bulkhead is not true. I made a backplate which is the rectangular thing you can see, partly in the 1st photo and more so being offered up for fit in the 2nd photo.
I made the whole thing, including the sliding doors, at home. The backplate and the vertical support pieces were made out of plywood, the frame was made of teak stained softwood to which the white plastic doubleU shaped racks are glued and the sliding doors which you will see in a minute were made out of thin plywood also stained in teak.
I then had to dismantle everything in order to fit in place. If you look very closely at the right hand side of it in the 2nd photo you can see that I cut the backplate in half, horizontally. I refitted the vertical support pieces, then screwed in the lower part of the sawn backplate, then mounted the top half of the sawn backplate.
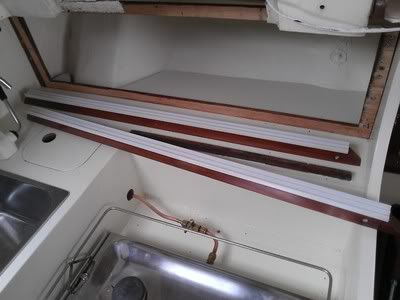
Then came the lower front frame rail, the vertical frame rails ( you can see the left hand side one in the 1st photo). Then I managed to fit the sliding doors and the top locating frame rail. It was all a bit fiddly due to the confine work space.
HUSH - Galley makeover
Posted: Sat May 05, 2012 9:02 am
by JoeWalling
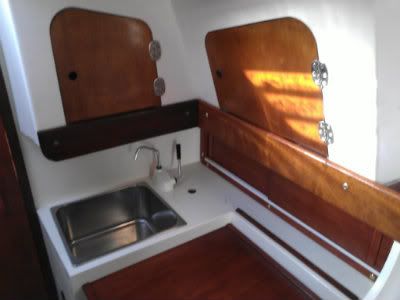
So, this is a set of photos showing the almost finished thing. The sliding doors worked out really well, covering up as they do some unsightly workmanship as well as providing useful accommodation for glasses,spices, gin and tonic bottles etc.
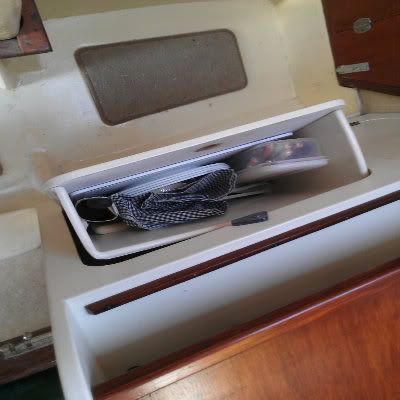
The left hand side front cupboard is not deep but I keep in there all the boat cleaning products and cloths and dustpan and brush etc. The right hand side door has a glassfibre bin screwed in the back of it and it is quite large as you might see from photo 3. In there are a couple of chopping boards, plates and kitchen utensils, some of which you can see sit in a long thin plastic container. There is plenty of room for table cloths and other stuff.
I made a cover to go over the stove which you can see. Again this is made of plywood with stained softwood edgings. It looks neat in my view and is suspended above the cooker, sitting on four plastic lugs. I may replace the cooker at a later stage but it works fine. It is fed by a gas bottle which sits in the anchor locker. There is a 6 inch inspection hatch on the starboard side of the forward bulkhead. You open this hatch ( from the inside of the boat) to turn the gas and off at the regulator.
HUSH - Galley makeover
Posted: Sun May 06, 2012 5:36 am
by luigisante
Great work. The paint job looks spectacular. I thought it was starboard when I first saw it. The multi level original design is more functional than my rebuilt galley with your addition of the cover over the cooker. That will make a great preparation space. I am trying to figure out how to make some kind of cover over the burners after I install them. The sliding doors add a classy look. Afterall, can you ever have evough gin storage? Very nice.
HUSH - Galley makeover
Posted: Thu May 10, 2012 2:02 am
by JoeWalling
Thanks again for your kind comments, Lou. It always takes me an age to do these things - especially as I'm now working at this boatyard - but I am pleased with the result. Cheers. Joe
Re: HUSH - Galley makeover
Posted: Mon Feb 18, 2013 11:50 pm
by twizzle
Hi, I have a telstar mk 2 in thornham marina which needs some modification. I would be grateful if we could get in touch sometime as I would like to pick your brains on how to go about it.
Cheers
Derek