Hi Joe,
Ron is correct. When we ran out of upload space, I started using my Photobucket account. First, you have to create a free account, the upload your photos to the photobucket album. Then, I resize the photos to 400 x 300 or 400 x 400. Once that is done, you will see a box with different URL's. Select the one for direct link and it will tell you that it is copied. Then come here to your open post, click on the "img" box above and paste the URL in the middle of the link. That should make the photo appear. Check it out in preview.
I'm looking forward to seeing your galley photos.
Lou
Mark 1 cabin refit ...
-
luigisante
- Posts: 319
- Joined: Wed Jul 08, 2009 1:19 pm
- Contact:
-
JoeWalling
- Posts: 145
- Joined: Sun Jun 28, 2009 1:33 am
- Contact:
Mark 1 cabin refit ...
http://s1073.photobucket.com/albums/w39 ... 000022.jpg
Hi Lou
I think I'm almost there. I created the account, uploaded this first picture, resized to 400 x 400, hit direct link then it all went wrong when I tried to copy and paste. Would you be able to amend the above so's I can get it right? There was also something like which I thought might boundarize the paste but it did'nt work so I deleted it.
Sorry for trouble. Cheers. joe
-
Ron
- Posts: 1136
- Joined: Mon Nov 24, 2008 6:15 pm
- Location: SW Florida
- Contact:
Mark 1 cabin refit ...
Joe -
I went to your photobucket site, hit the Share button, then selected Get Link Code, then IMG, then copied the link to this post by hitting the right mouse button and Copy. You could have manually put the IMG command around the url ( ) as well.
I went to your photobucket site, hit the Share button, then selected Get Link Code, then IMG, then copied the link to this post by hitting the right mouse button and Copy. You could have manually put the IMG command around the url (
Ron Marcuse
Telstar 28 #359 "Tri-Power"
Telstar 28 #359 "Tri-Power"
-
JoeWalling
- Posts: 145
- Joined: Sun Jun 28, 2009 1:33 am
- Contact:
Mark 1 cabin refit ...
Thanks a lot, Ron. You are up early. I'll play with that over the weekend. Trying to launch my boat today. Cheers. Joe
-
luigisante
- Posts: 319
- Joined: Wed Jul 08, 2009 1:19 pm
- Contact:
Mark 1 cabin refit ...
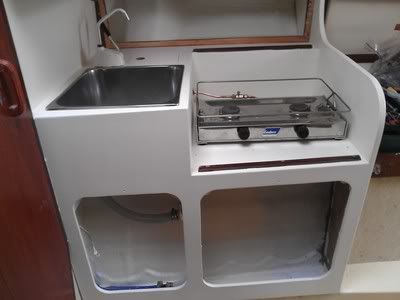
Looks great Joe. I like the large openings below for access to the thru-hull and plumbing. Is that paint/wood or starboard?Ron wrote:
-
luigisante
- Posts: 319
- Joined: Wed Jul 08, 2009 1:19 pm
- Contact:
Mark 1 cabin refit ...
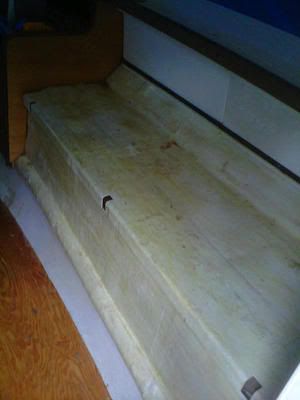
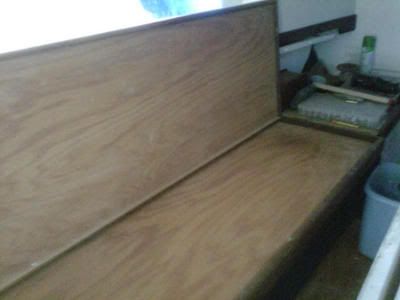
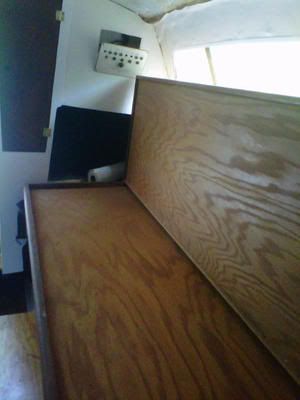
A quick update. I'm cleaning up the starboard and the rest of the unfinished areas in the Cabin. The settee base was first coated with adhesive and a large piece of carpet was prepared.
The carpet was glued in place.
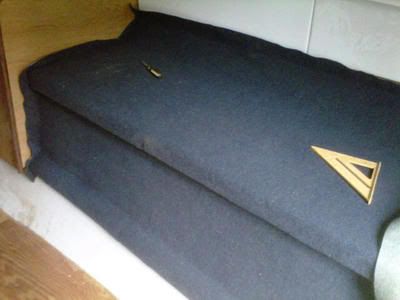
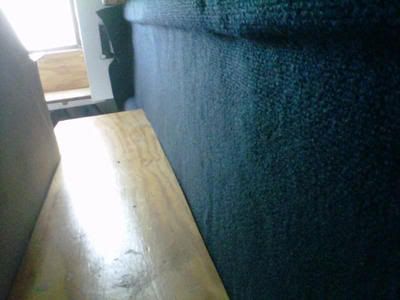
Then the fitting began around the edges. Tedious work.
The edges look very clean, once fitted.
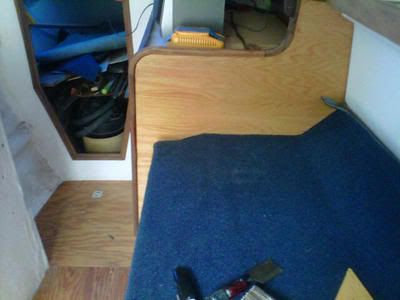
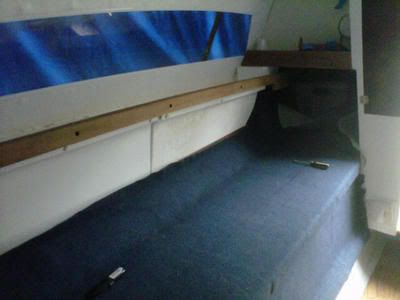
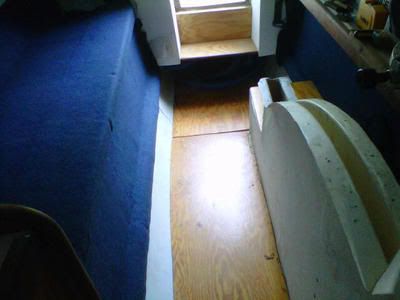
Once the starboard side was fitted on the galley edge, the port side was carpeted.
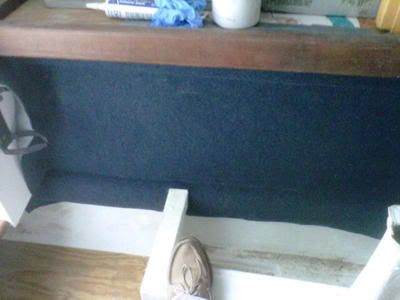
Top and bottom fitted.
Forepeak looking back. It's starting to look good in here.
The cabin needs some clean-up work, like refitting the trim on the Starboard side window and removing the hinges from the Starboard storage bins (I'm converting them to the same wood retainer as the port side, mimicing the original design). I'm starting on fitting the centerboard. I am going to try to install it from the inside and document it, since I've seen this question quite a bit. I have some clean-up work in the forepeak as well. I'm looking for a 9.9 yamaha high thrust outboard to hang on the side for now. I can keep it as a dingy kicker when I install the jet drive next winter. I'm hell bent on finishing up what is left, installing the rest of the hardware and getting the boat in the water this summer. I need to complete the electrical system but I can worry about the remaining systems later. I just got a book on 12 volt systems and will be trying to refit the electrical system in the cabin.
Lou
The carpet was glued in place.
Then the fitting began around the edges. Tedious work.
The edges look very clean, once fitted.
Once the starboard side was fitted on the galley edge, the port side was carpeted.
Top and bottom fitted.
Forepeak looking back. It's starting to look good in here.
The cabin needs some clean-up work, like refitting the trim on the Starboard side window and removing the hinges from the Starboard storage bins (I'm converting them to the same wood retainer as the port side, mimicing the original design). I'm starting on fitting the centerboard. I am going to try to install it from the inside and document it, since I've seen this question quite a bit. I have some clean-up work in the forepeak as well. I'm looking for a 9.9 yamaha high thrust outboard to hang on the side for now. I can keep it as a dingy kicker when I install the jet drive next winter. I'm hell bent on finishing up what is left, installing the rest of the hardware and getting the boat in the water this summer. I need to complete the electrical system but I can worry about the remaining systems later. I just got a book on 12 volt systems and will be trying to refit the electrical system in the cabin.
Lou
-
luigisante
- Posts: 319
- Joined: Wed Jul 08, 2009 1:19 pm
- Contact:
Mark 1 cabin refit ...
This summer has turned out to be less productive on the boat than I hoped. Work and family issues have taken most of my time this summer (why don't these things come up in the winter?). Anyway, was able to spend a day on the boat yesterday doing a lot of fitting work. I fitted the port settee so that it sits more upright in the back.
I was working on the braces for the bunks, which, it appears, will be fairly easy to fabricate. I'm using supports underneath only.
I've started removing the epoxied hinges on the portside bins so that I can make them removable like the ones on the starboard side.
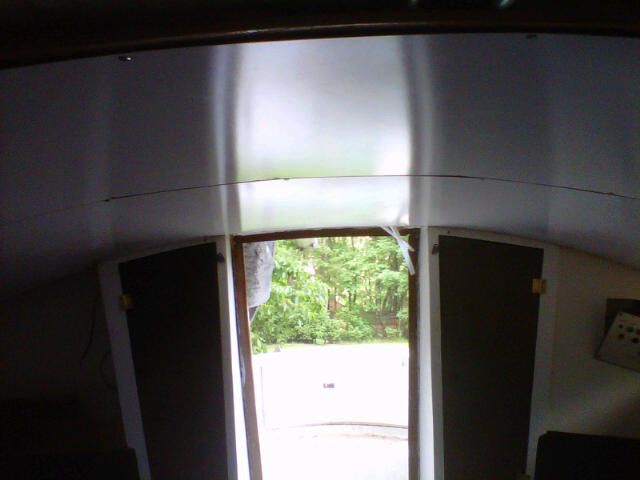
I also spent the remainder of my time fitting the door between the main cabin and the forepeak.
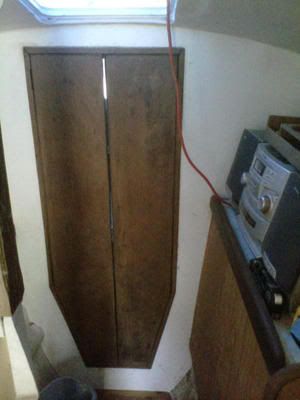
It is almost ready for hanging after a significant amount of sanding to the jams to square them off.
Hopefully, I can get some serious work-time on the boat in August.
Lou
I was working on the braces for the bunks, which, it appears, will be fairly easy to fabricate. I'm using supports underneath only.
I've started removing the epoxied hinges on the portside bins so that I can make them removable like the ones on the starboard side.
I also spent the remainder of my time fitting the door between the main cabin and the forepeak.
It is almost ready for hanging after a significant amount of sanding to the jams to square them off.
Hopefully, I can get some serious work-time on the boat in August.
Lou
-
luigisante
- Posts: 319
- Joined: Wed Jul 08, 2009 1:19 pm
- Contact:
Re: Mark 1 cabin refit ...
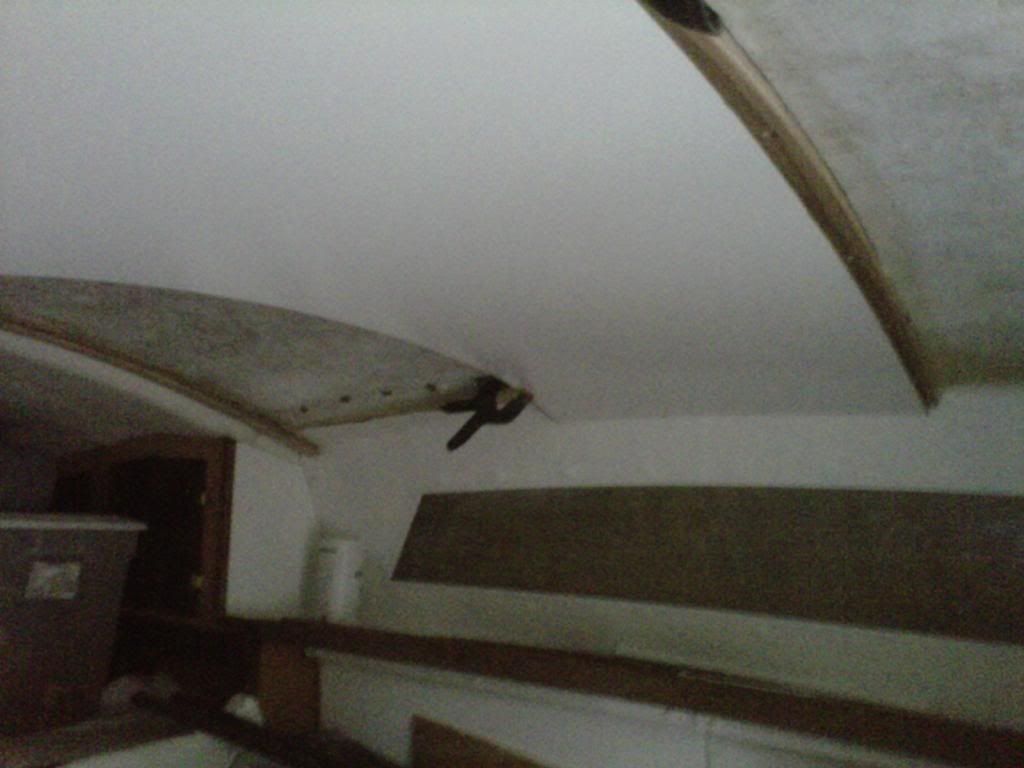
I finally settled down the chaos that resulted from the departure of my partner of 10 years from our firm and started back on the boat in May. I have a lot of pictures that I will post as I can squeeze them in. I'm in the process of finishing up the ceiling at the moment. I'm struggling with the materials available to make the panels needed to span in the ribs I've bonded onto the coachroof. Here are the most recent pictures so you can see the progress on the ceiling.
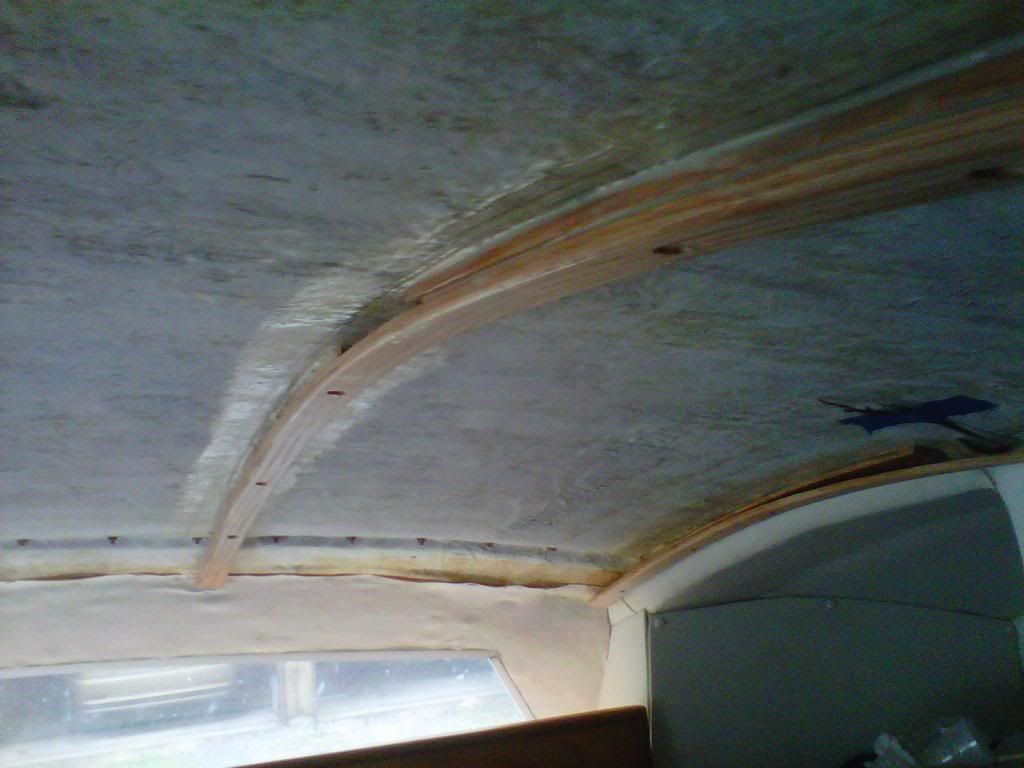
The design challenge was to make a ceiling that will give me access to the coachroof for any future expansion, such as a second hatch, winches near the cockpit and solar panels. I also have decided that the best way to run additional wiring is on the roof (I am repairing the existing electrical system but intend to completely replace it in the future. I decided to use oak strips to make the ribs for the ceiling panels. The strips are bonded onto the coachroof in such as was as to provide a pathway for wiring.
I started by bonding oak doorstop molding strips onto the coachroof. The short length is purposeful.
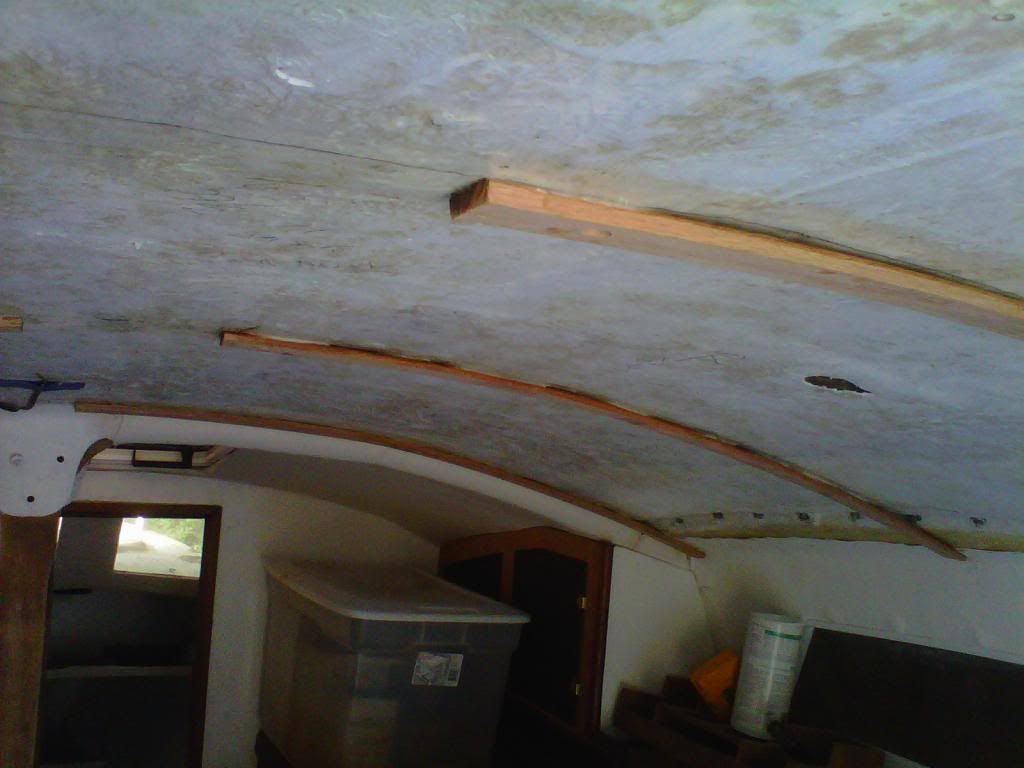
The strips were located 24" on center from each other.
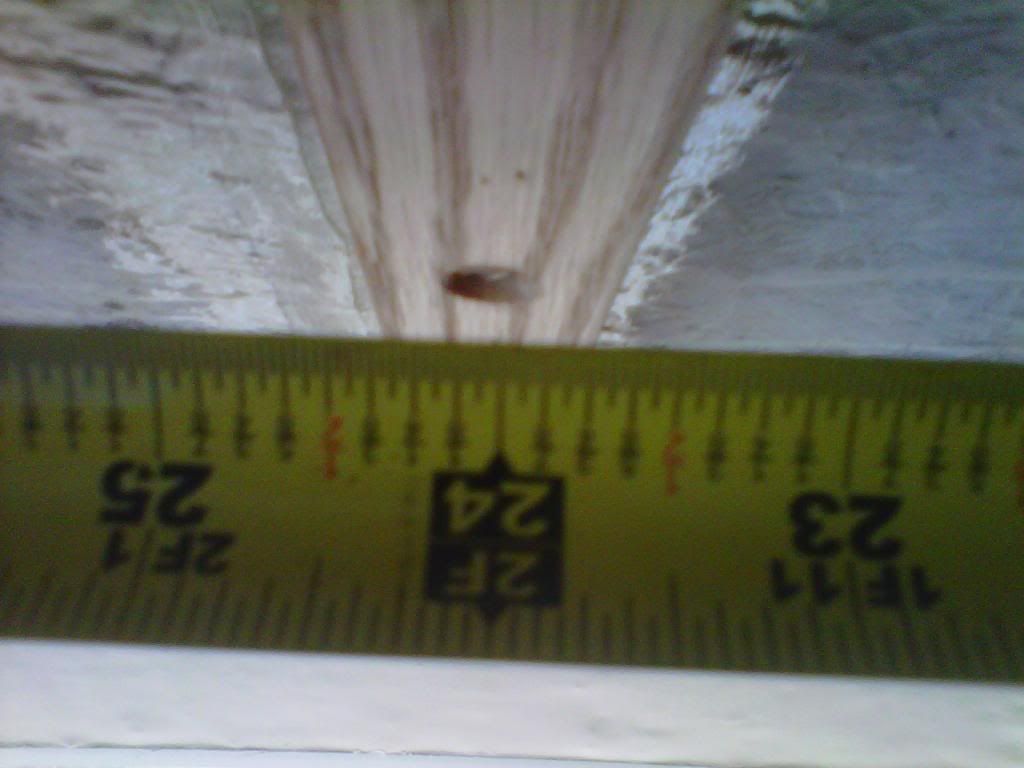
That permits 3 24" wide panels to cover the entire ceiling. Caution here, nothing is square on the coachroof. There are minor variances from side to side and front to back. For instance the port side from back to front is 3/4" longer than the starboard. I started in the middle and worked out toward the ends. That permitted me to strike a perpendicular line to make the ceiling straight. But, realize that nothing is going to be perfect and you have to fudge all the measurements (fuzzy math?).
Once the base strips were bonded, I added a filet bond and then placed a strip to cover the entire coachroof.
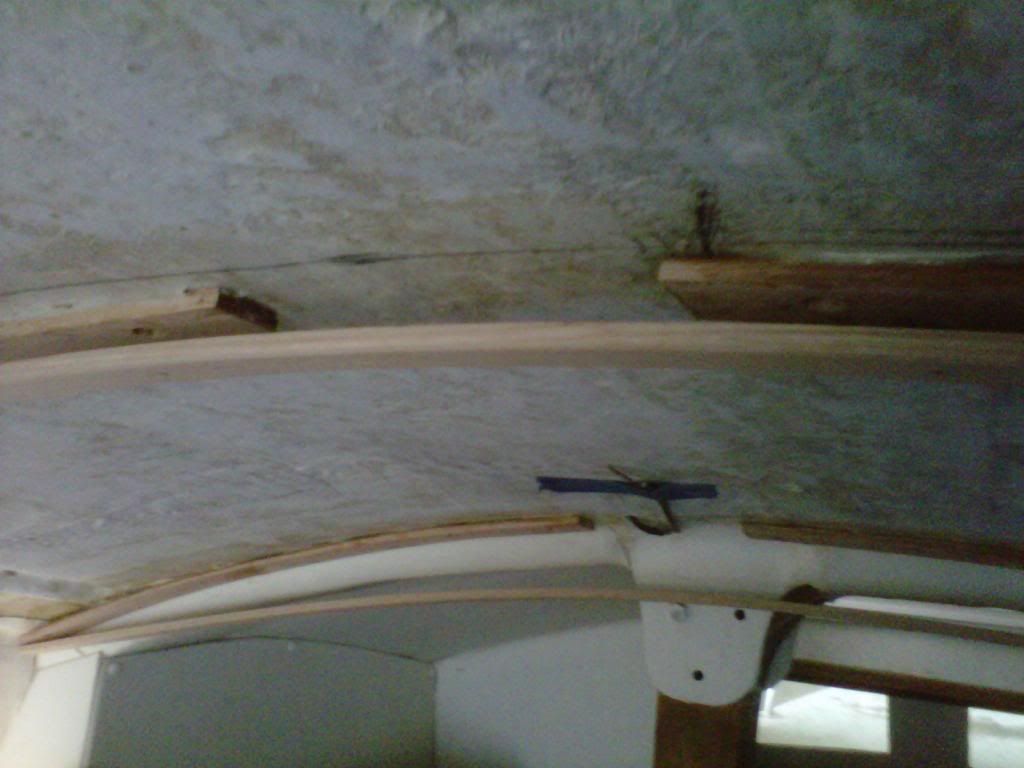
Those strips were screwed and bonded to the base strip.
You can see the space this creates to run wiring in the ceiling.
These ribs should be plenty strong and may even strengthen the coachroof for when I make a cutout for the second hatch I intend to install eventually.
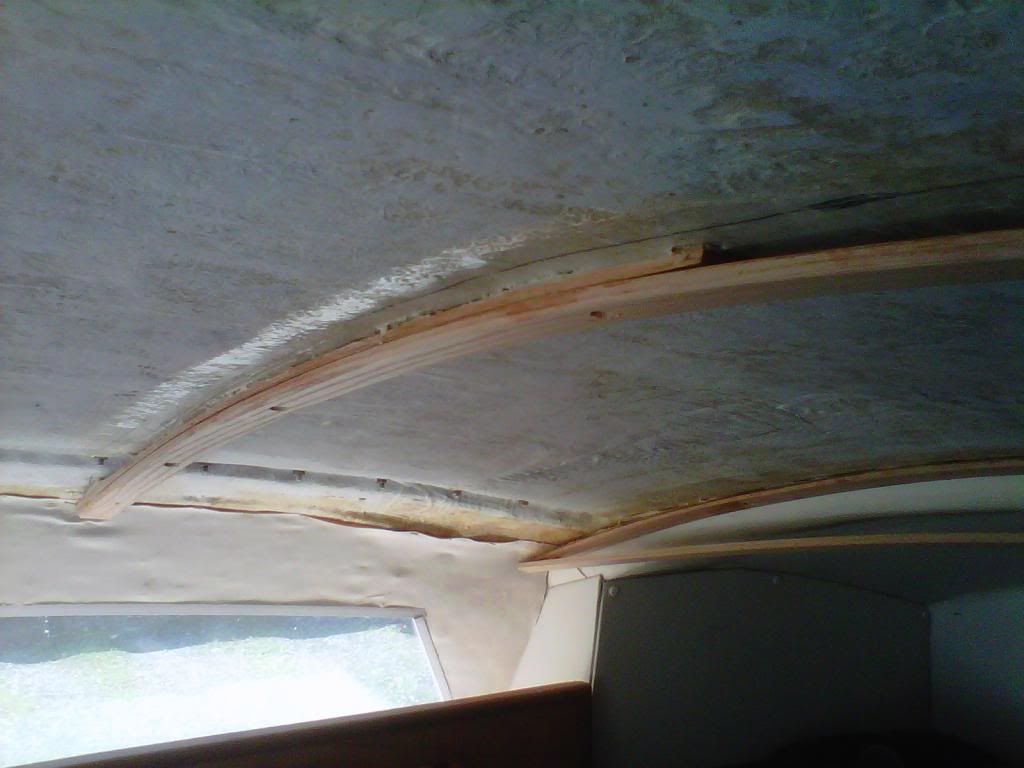
Here's what it looks like when it's nearly done.
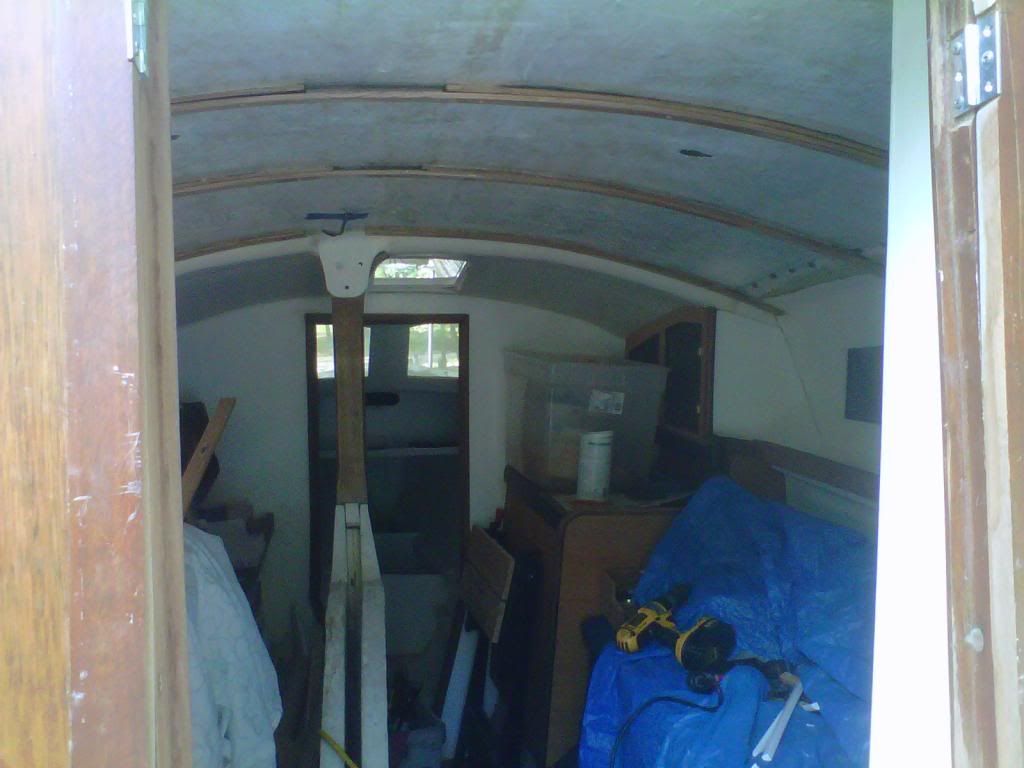
The design allows the original door trim to be reused.
I am using a white finished Masonite for a template maker, but like the way it looks and considering using it for now. I am concerned that the Masonite will not stand up well to moisture. I'm sure that a piece of fiberglass or formica would be a better option but this is so easy to work with that I am just thinking about screwing the template in place. Has anyone else used Masonite? Since everything on top of the ribs is replaceable, it would not be a serious setback if I had to eventually replace the material.
As you can see, at least in the center, I was able to catch the ribs nearly in the middle, leaving room to fasten the other panels. I'll cover the seams with another oak strip.
I have been busy with other details elsewhere in the boat. I'm trimming out as much of the cabin as I can and covering certain surfaces with carpet. The interior needs a good cleaning and then I can make a punch list to finish the cabin for now.
The goal here is to get the boat to water as soon as I can. I am streamlining the rest of the work to that end. I'll post pictures of the details I've been working on when I get some more time. For now, enjoy your season. I'm glad to be less focused on work and back working on the boat.
Lou G.
The design challenge was to make a ceiling that will give me access to the coachroof for any future expansion, such as a second hatch, winches near the cockpit and solar panels. I also have decided that the best way to run additional wiring is on the roof (I am repairing the existing electrical system but intend to completely replace it in the future. I decided to use oak strips to make the ribs for the ceiling panels. The strips are bonded onto the coachroof in such as was as to provide a pathway for wiring.
I started by bonding oak doorstop molding strips onto the coachroof. The short length is purposeful.
The strips were located 24" on center from each other.
That permits 3 24" wide panels to cover the entire ceiling. Caution here, nothing is square on the coachroof. There are minor variances from side to side and front to back. For instance the port side from back to front is 3/4" longer than the starboard. I started in the middle and worked out toward the ends. That permitted me to strike a perpendicular line to make the ceiling straight. But, realize that nothing is going to be perfect and you have to fudge all the measurements (fuzzy math?).
Once the base strips were bonded, I added a filet bond and then placed a strip to cover the entire coachroof.
Those strips were screwed and bonded to the base strip.
You can see the space this creates to run wiring in the ceiling.
These ribs should be plenty strong and may even strengthen the coachroof for when I make a cutout for the second hatch I intend to install eventually.
Here's what it looks like when it's nearly done.
The design allows the original door trim to be reused.
I am using a white finished Masonite for a template maker, but like the way it looks and considering using it for now. I am concerned that the Masonite will not stand up well to moisture. I'm sure that a piece of fiberglass or formica would be a better option but this is so easy to work with that I am just thinking about screwing the template in place. Has anyone else used Masonite? Since everything on top of the ribs is replaceable, it would not be a serious setback if I had to eventually replace the material.
As you can see, at least in the center, I was able to catch the ribs nearly in the middle, leaving room to fasten the other panels. I'll cover the seams with another oak strip.
I have been busy with other details elsewhere in the boat. I'm trimming out as much of the cabin as I can and covering certain surfaces with carpet. The interior needs a good cleaning and then I can make a punch list to finish the cabin for now.
The goal here is to get the boat to water as soon as I can. I am streamlining the rest of the work to that end. I'll post pictures of the details I've been working on when I get some more time. For now, enjoy your season. I'm glad to be less focused on work and back working on the boat.
Lou G.
-
luigisante
- Posts: 319
- Joined: Wed Jul 08, 2009 1:19 pm
- Contact:
Re: Mark 1 cabin refit ...
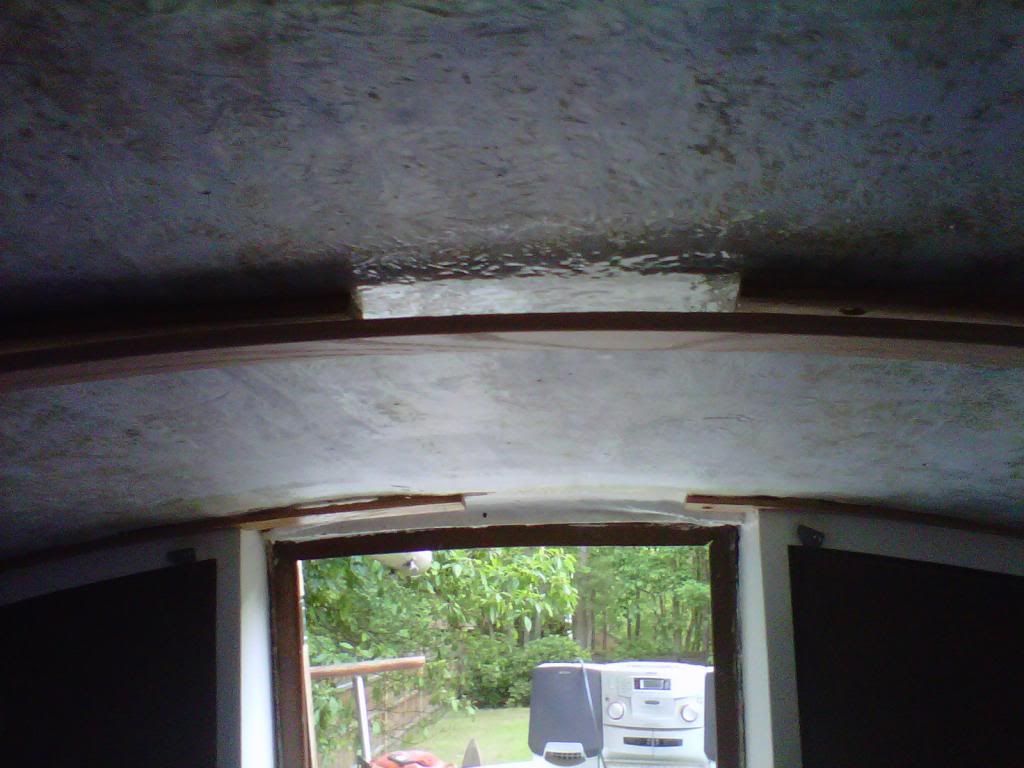
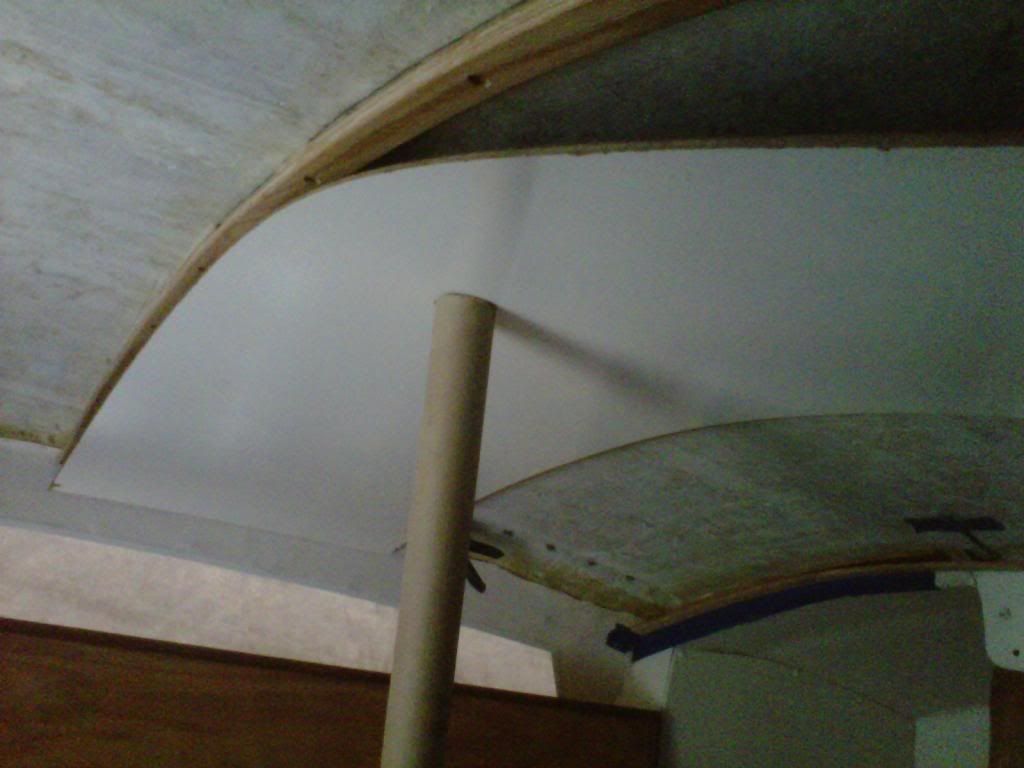
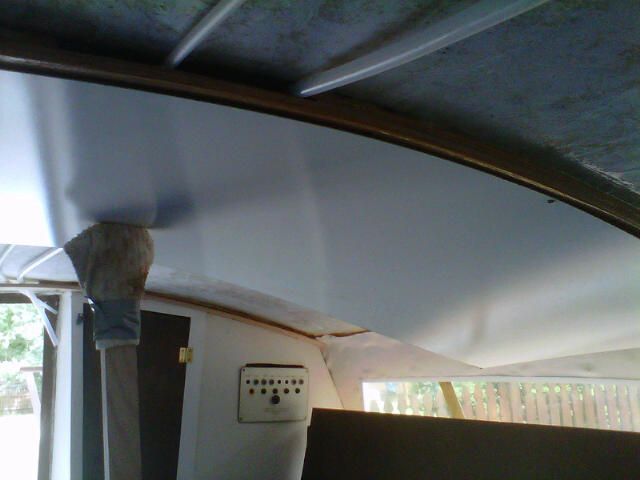
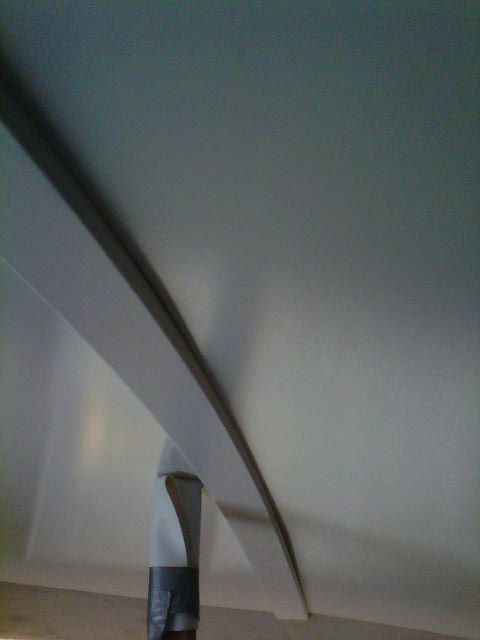
Most of the ceiling panels are in place and ready to be trimmed. I like the glossy surface on the coachroof. It brings light into the cabin.
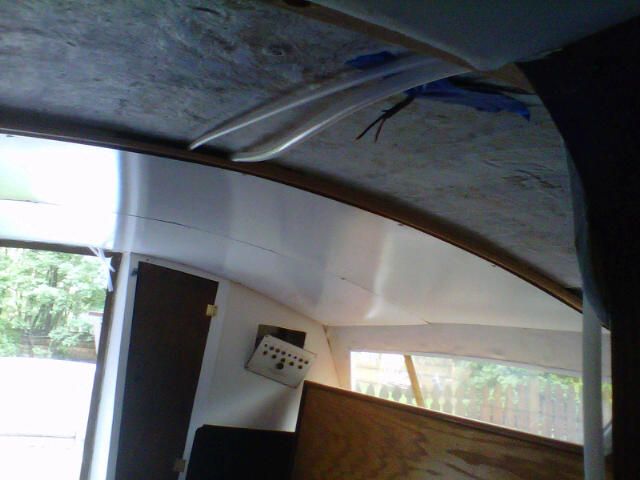
You can see the tube I ran through the wire openings as a conduit so I can easily feed any additional wiring I will need to complete the cabin. I'm just rebuilding the original fuse panel for the moment. A full rewiring and breaker panel can wait. There are a few circuits like the speedo and speedo light that will provide space to put the radio, galley light and a couple of 12v outlets in the cabin.
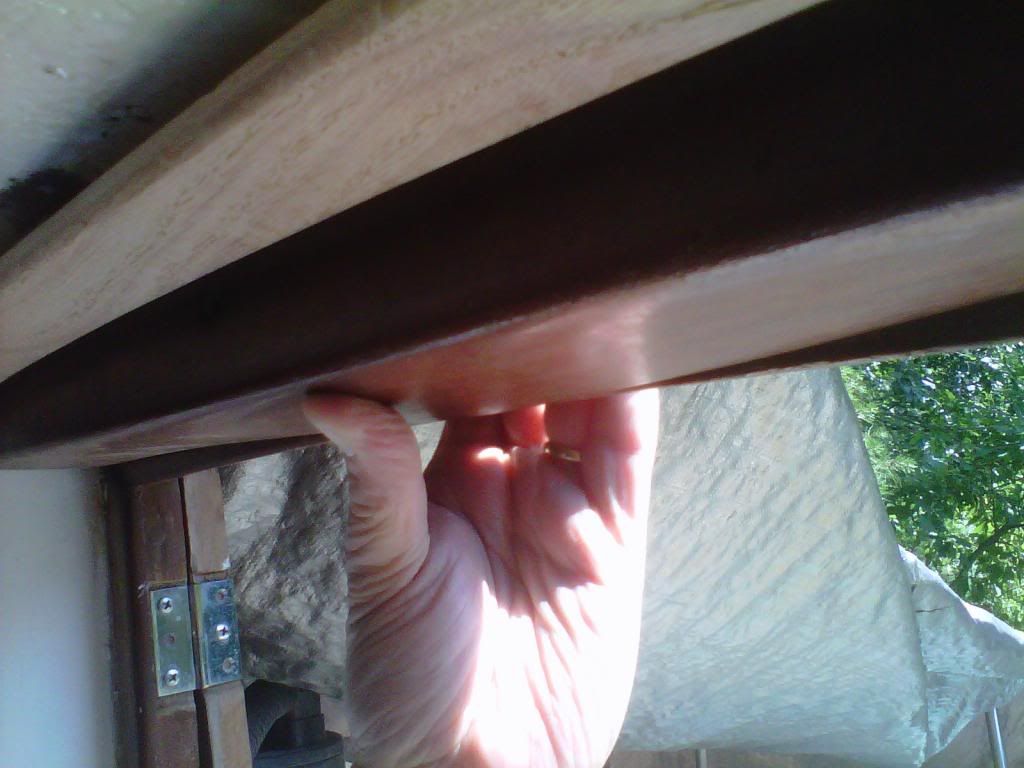
I had a hard time holding the panels in place to measure and fasten until I fabricated an extra arm to hold the panels near where they will be installed.
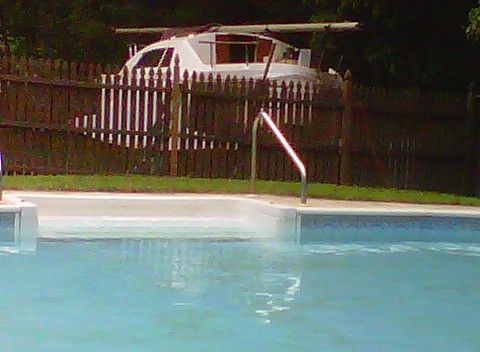
Here is the boat, as close to water as it's been in a long time.
As soon as I'm done wiring the few fixtures I'm putting in the cabin, I'll leave wires for the radio and move onto finishing out the forepeak and installing the centerboard. When that is done, I'm ready to start rebonding on the boat's hardware and making plans to transport the boat to a boatyard where I can start to work on the standing rigging.
Lou
You can see the tube I ran through the wire openings as a conduit so I can easily feed any additional wiring I will need to complete the cabin. I'm just rebuilding the original fuse panel for the moment. A full rewiring and breaker panel can wait. There are a few circuits like the speedo and speedo light that will provide space to put the radio, galley light and a couple of 12v outlets in the cabin.
I had a hard time holding the panels in place to measure and fasten until I fabricated an extra arm to hold the panels near where they will be installed.
Here is the boat, as close to water as it's been in a long time.
As soon as I'm done wiring the few fixtures I'm putting in the cabin, I'll leave wires for the radio and move onto finishing out the forepeak and installing the centerboard. When that is done, I'm ready to start rebonding on the boat's hardware and making plans to transport the boat to a boatyard where I can start to work on the standing rigging.
Lou
-
luigisante
- Posts: 319
- Joined: Wed Jul 08, 2009 1:19 pm
- Contact:
Re: Mark 1 cabin refit ...
Two inch trim covers the coachroof seam and secures the panels nicely.
Who is online
Users browsing this forum: No registered users and 25 guests