Here is th imperial version.
Cliff
CB 14.07 rev A Imperial_1.jpg (74.24 KiB) Viewed 88 times
Telstar 26 MK1 Centreboard
-
Evoxrs
- Posts: 0
- Joined: Tue Aug 01, 2017 1:59 pm
- Contact:
-
luigisante
- Posts: 319
- Joined: Wed Jul 08, 2009 1:19 pm
- Contact:
Telstar 26 MK1 Centreboard
Great job on the drawing! That being said ... any ideas on how to shape the airfoil shape? I have both the center board and a rudder that I made using the Gougeon Brothers rotated mahogony strips method. I have not been able to come up with a good method of shaping the board (with hand tools, which is all I have, other than a compound miter saw), using a negative of the airfoil shape as a guide. I cut reference lines across the grain of the airfoil at the appropriate depths. I shaped balsa core surfboards like this as a kid. I guess I could do the same here. just wondering if anyone has an easier way.
Lou
Lou
-
Evoxrs
- Posts: 0
- Joined: Tue Aug 01, 2017 1:59 pm
- Contact:
Telstar 26 MK1 Centreboard
I would use a long plane and a sanding block and cut a female profile (in one piece) of both sides of the board final shape so it will be a u shape template. Mark with a line the start of the curve on both sides of the thin edge and the line of the extent of the shaping on the sides of the board. Also mark the cross sectional shape on the end of the board as a reminder of the shape you want whilst you are shaping and then plane by eye. As you get close to the shape slide the template along the centreboard to identify high spots and finish with sand paper block. I don't think it will be as difficult as you think and providing you are close to the guide lines at the end of the day any wavyness with not be visible once it has been antifouled. I think as long as long as the shape is approximately correct and the chamfer is smooth it will perform fine. Mine is going to be made by a shipwright so I will ask him how he is going to do it and let you know but my guess is he'll have power tools to use.
I would practice on a spare peice of ply first. You also will have a continuous guide in the form and shape of the laminations in the ply. As you plane you can easily monitor the shape using the ply laminations to guide each part of the material removal. You just need to make sure that each lamination is the same length as you plane and you will know that the chamfer is all at the same angle. I did this when I made my new tiller, it was quite a reliable guide to getting an equal curve on each side of the tiller handle.
Cliff
see pics
2. New Tiller for Tryfly 3.jpg (201.89 KiB) Viewed 74 times
02. New Tiller for Tryfly 3.jpg (224.33 KiB) Viewed 74 times
-
Gin
- Posts: 7
- Joined: Mon Mar 09, 2015 1:36 pm
- Contact:
Re: Telstar 26 MK1 Centreboard
Hello,Pat Ross wrote:Hi Johnco,
Welcome to the 26 and 8M section of the Telstar Owners Association. There are several folks working on centerboards now, whether they are near their computers I don't know and there is at least one person who has replaced their's, I need to do that myself. I have attached the only drawing I have, I am not sure if it will help you.
MK2 Centerboard.JPG (54.63 KiB) Viewed 172 times
There is more information at this link, you must be a Member to access the info. Perhaps something there will help you as well:
http://www.telstarowners.org/cms/viewforum.php?f=24
Best of luck to you,
Pat
I am helping a friend bring his Mk2 up to date but on this windy weekend he has just messaged me to say his centreboard has snapped clean off, fortunately in the estuary in Kent, UK.
We shall now have to recreate the board but without the advantage of a pattern and I wonder if you still have a working link to you centreboard .JPG- which I can't access for some reason from the owners site (I am a member), or even better do you have any drawings we could use please?
I hope you may be able to help but thanks for any response you may make.
Gordon
-
Hull52
- Posts: 116
- Joined: Sat Aug 09, 2014 4:43 pm
- Contact:
Re: Telstar 26 MK1 Centreboard
I haven't had a lot of time to work on the boat this summer but I did get the centerboard lofted and installed in the boat.
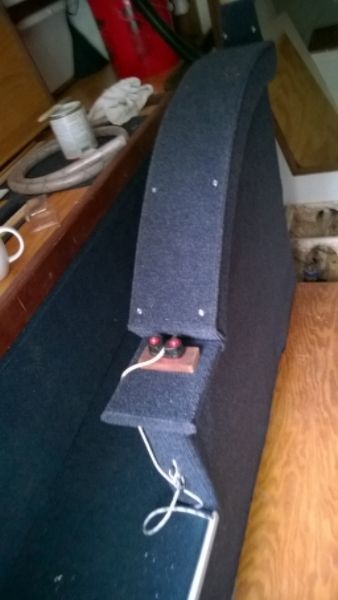
Here are a couple of shots from the larger refit thread. This one is the covering on the outside of the centerboard case. Note the couple of inches I added to the height of the top of the case to accommodate the eye hook and the small triangular piece that was on the original "beak" of the board. By keeping that slot that the beak rides down tight, I have kept the board from flopping side to side.
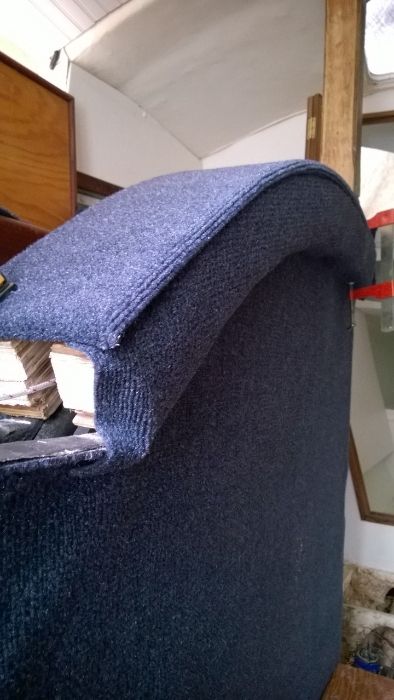
The top piece is easily removable to replace the small braded line that helps lower the board and lock it in place once it is in position. I will use a cam cleat to keep the board down. It should help protect the board if it strikes anything.
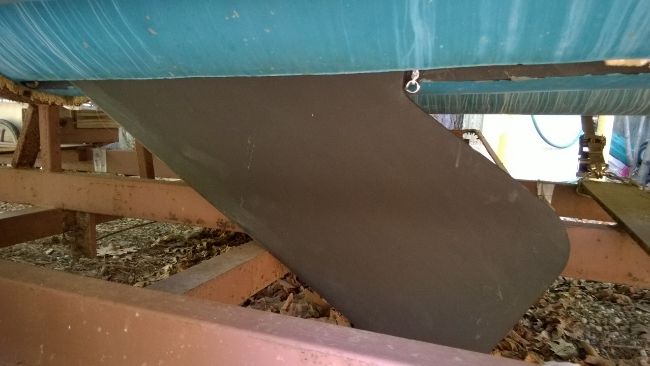
And, here is the board in the down position as far as it will go on the trailer. You can see that I got a decent loft on the leading edge and the trailing edge tapers nicely.
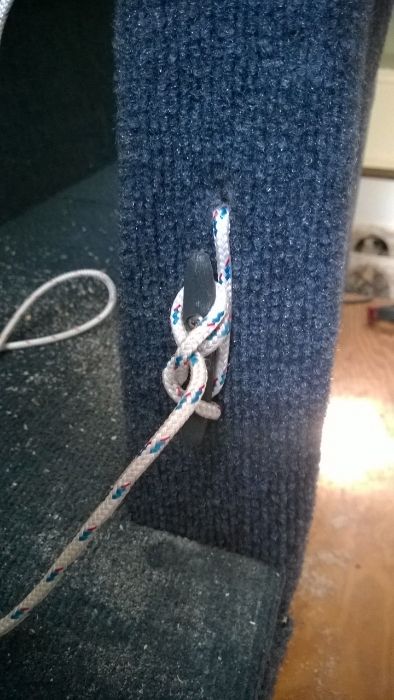
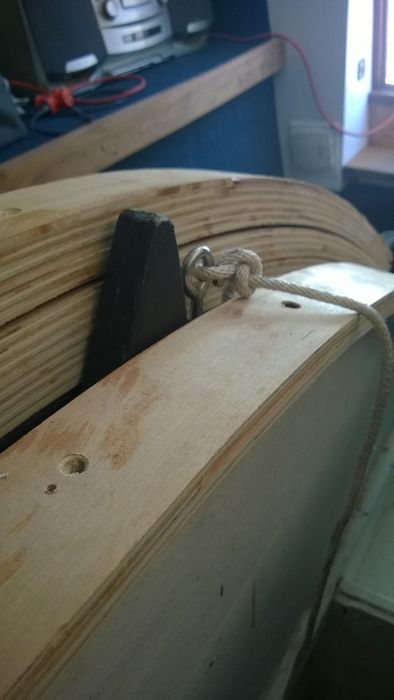
The eyehook is for lifting the board back into the case and tying it off with a chock. Here is the chock inside with the lifting line tied off in the up position.
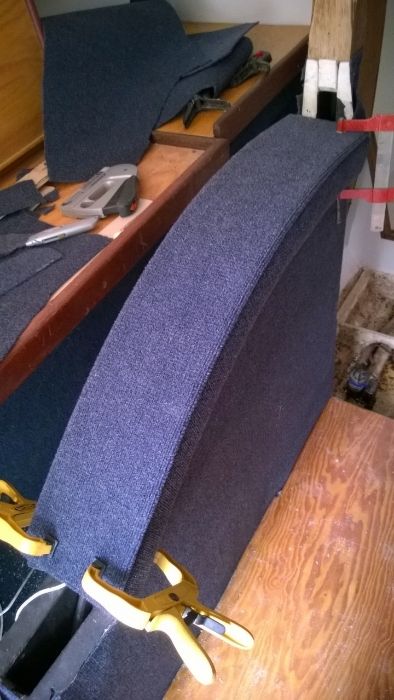
Here is a construction detail of building up the centerboard's sides and the eye which controls the braided chord that will lower the board and lock it down. With an up line and a down line, you should be able to infinitly control the centerboard's position.
And, here is the completed centerboard case.
Here are a couple of shots from the larger refit thread. This one is the covering on the outside of the centerboard case. Note the couple of inches I added to the height of the top of the case to accommodate the eye hook and the small triangular piece that was on the original "beak" of the board. By keeping that slot that the beak rides down tight, I have kept the board from flopping side to side.
The top piece is easily removable to replace the small braded line that helps lower the board and lock it in place once it is in position. I will use a cam cleat to keep the board down. It should help protect the board if it strikes anything.
And, here is the board in the down position as far as it will go on the trailer. You can see that I got a decent loft on the leading edge and the trailing edge tapers nicely.
The eyehook is for lifting the board back into the case and tying it off with a chock. Here is the chock inside with the lifting line tied off in the up position.
Here is a construction detail of building up the centerboard's sides and the eye which controls the braided chord that will lower the board and lock it down. With an up line and a down line, you should be able to infinitly control the centerboard's position.
And, here is the completed centerboard case.
Who is online
Users browsing this forum: No registered users and 2 guests